Dishwasher - How to replace outlet hose
Solución

Refer always to your product’s user manual safety information before any repair or maintenance operation. https://www.electrolux.com/support/user-manuals/

WARNING! RISK OF ELECTRIC SHOCK
Before any repair or maintenance operation, deactivate the appliance and disconnect the mains plug from the socket.
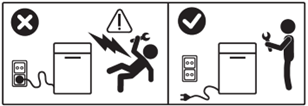
WARNING! RISK OF INJURY

Always take care when moving appliances. For heavy appliances it's safest for two persons to move it. Always use safety gloves and safety footwear. Wear safety gloves at all times to protect from cuts from sharp edges.
WARNING! RISK OF EYE INJURY

Wear safety glasses if you perform maintenance or repair work involving springs.

WARNING! CHOKING HAZARD
Small parts not for children under 3 years. Keep all small parts and packaging out of reach of children.
Only adults should use or install the product.
Before any repair or maintenance operation, turn off water supply to the appliance.
Make sure to use the product only for its designated purpose and verify that it is a compatible part for the intended product.
Do not use or install the product if damaged.
Please note that self-repair or nonprofessional repair can have safety consequences if not done properly and might void the warranty. Possessing the necessary know-how is essential.
HOW TO REPLACE OUTLET HOSE
1. Remove the filter and it’s housing the use a small syringe and some old towels to drain the water in the sump.

2. Unscrew the four PH2 screws holding the bottom cover of the dishwasher and then pull the cover towards you to remove.

3. Unscrew the two PH2 screws on the top of the right hand side panel and the three PH2 screws along the back of the right hand panel.

4. Use a small flat bladed screwdriver to prise open the three clips holding the side panel to the appliance, then pull the side panel from back to front to release.

5. Compress the two tabs on the outlet hose holder on the rear of the appliance then push the outlet hose through into the body of the appliance.

6. Cut the cable tie supporting the outlet hose to the chassis of the appliance.
NOTE: Ensure the cable tie is replaced correctly during reinstallation

7. Unscrew the two PH2 screws on the top of the right hand side panel and the three PH2 screws along the back of the right hand panel.

8. Using pliers, squeeze the jubilee clip and slide the clip to down the hose.

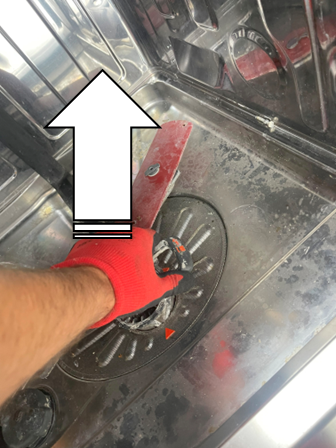
9. Pull the drain hose away from the sump.
NOTE: Residual water may leak from the hose at this stage. Ensure that during reinstallation you refit the hose into the correct position on the sump using the slotted guide on the outlet hose.

10. Pull the outlet hose from the sump and from the back of the appliance out the side to remove the hose.

11. When assembling, repeat steps in reverse order.
¿Le ha resultado útil este artículo?
Artículos relacionados
- Lavavajillas - Cómo reemplazar la manguera de entrada de agua
- Lavavajillas - Cómo reemplazar la manguera de desagüe (3)
- Lavavajillas - Cómo reemplazar la manguera de desagüe (1)
- Lavavajillas - Cómo reemplazar el sensor de turbidez (1)
- Lavavajillas - Cómo reemplazar el pestillo
- Lavavajillas - Cómo reemplazar el sensor de turbidez (3)
- Lavavajillas - Cómo reemplazar el sensor de turbidez (2)
- Lavavajillas - Cómo reemplazar la cerradura de la puerta (2)
- Lavavajillas - Cómo reemplazar la junta de drenaje
- Lavavajillas - Cómo reemplazar el tornillo de ajuste del pie
O consulta la página de reparaciones
Consulta en nuestra página de reparaciones los distintos servicios de disponibles y elige cuál de ellos se adapta mejor a tus necesidades.
Repuestos y Accesorios
Encuentra repuestos originales para tu electrodoméstico en nuestra tienda online y recíbelos directamente en tu domicilio.
Registra online un servicio de reparación
Si no encuentras solución a tu problema puedes registrar online una visita del servicio técnico para reparar tu electrodoméstico. Este servicio podrá tener costes asociados dependiendo de la naturaleza de la avería.